User Tools
Sidebar
Table of Contents
Painting a Dart Gun
…with the aim of looking in-character on the cheap.
So you've bought a dart gun (I recommend second-hand off eBay for cheap bundles of them), but unfortunately it's a nasty lump of coloured plastic. Time to paint it so it looks more IC! Compared to standard LRP weapons, a dart gun is easy to find and fairly cheap, but needs a bit of work to feel good threatening someone with it in a tense, high-immersion combat situation.
Thankfully, painting up a dart gun to look good is fairly straightforward even for the artistically disinclined.
Things you will need
- Some relatively fine sandpaper to provide a key for the paint - get as high a grit as you can find - I used 400 grit here.
- Some relatively coarse sandpaper to sand off the logos - 80/120 grit is what I used.
- Black, white or grey acrylic paint for a base coat.
- Whatever other colours of acrylic paint for your main colours.
- Some metallic acrylic paint for any metal bits - you don't need much of this, I recommend popping into Games Workshop and picking up one of their metallic range, which are good colours with lots of pigment.
- Optional varnish.
- Optional spray paint (more expensive).
Spray Paint - Benefits and Drawbacks
- Spray paint will give you more even colour and no brush marks.
- Spray paint will take you less actual painting time.
- Spray paint requires fewer coats.
- Spray paint is expensive compared to manual painting.
- Spray paint emits fumes both while you are spraying it and as it dries, so you need to have somewhere outside to do your spraying.
- Spray paint will need you to mask off or put resists on some of the components of your gun (especially the mechanisms).
- For best results with spray paint, you should really be taking your gun apart and spraying the components individually, which you might not want to do.
Preparation
If you don’t want to take your gun apart, then don't. You can get a pretty good paint job done without cracking it open, particularly if you're doing all your painting by hand rather than spray paint.
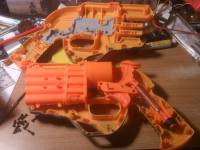
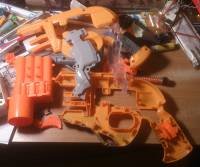
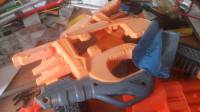
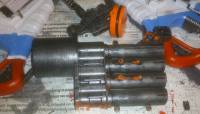
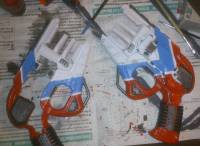
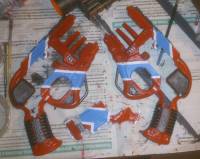
That said, most dart guns are pretty easy to take apart and reassemble, although you need to make sure you keep all the screws and springs, and possibly consult some youtube videos or record your deconstruction with photos in case you forget which internal components go where. Most Nerf guns use relatively small Phillips screws throughout, but sometimes they can be set pretty deep in the casing, so ideally you want to use a precision screwdriver.
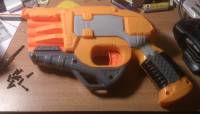
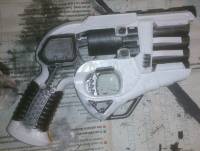
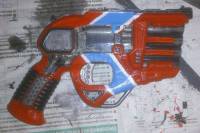
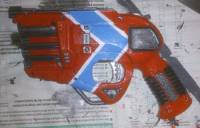
The gun in this guide is a Nerf Doomlands Persuader, which has a transparent panel that I wanted to keep that way, so opening it up and painting the inside was pretty important.
Sanding
Whether you have cracked open your gun or not, you will probably want to get rid of the raised logos, toy safety marks, etc. - these will show up even more in relief when you have painted the gun, so you definitely want to get rid of them. Use your coarse sandpaper to sand them down until the non-raised surfaces around the test starts to show scratching. You can tear or fold the paper into smaller bits to get into cracks or avoid sanding down parts you want to keep. You should wear a dust mask while sanding.
Next step is to provide a key in the smooth plastic for the paint to adhere to. Use your finer sandpaper to roughen the surface of any exposed parts that you intend to paint. Avoid going into the dart-holding components or internal mechanisms like plungers - you dont want to make jams more likely by gunking up these mechanisms too much. Once you've sanded everything, rub the whole thing with a damp rag to get the dust off.
Base Coating
You'll need a good base coat to prevent the plastic of the gun showing through and building up a good surface for your colour layer. Grey is a pretty all-purpose base coat colour, but use black if you want a darker colour scheme (and for metallic parts for reasons explained below) and white for brighter colours (although it will take a lot of coats to build up a good white base). You might need to do a lot of coats, both at this stage and at later stages - if you are painting by hand you can speed up the time between coats by using a hot hair dryer to dry everything out.
Metallic Components
A really good technique for parts you want to have a metallic look is to drybrush a black base coat with your metallic paint. Drybrushing is a bit messy, so do it before you do your main colours. Dip your brush in a bit of paint, and then brush off most of the paint into the pot or on a bit of newspaper, so the brush has a layer of pigment on it, but there isn't really any liquid paint left on it. Then use light strokes going back and forth across the area you want to colour - this is a nice and quick way to give a bit of colour on a dark background, and looks great for metallic areas (although works for other colours as well).
Main Coat
Once you've base coated, build up repeated coats of your main colour(s). Use lots of coats rather than just slathering the area with paint - it takes longer, but the colour will be more consistent, with fewer brush marks and better control.
Note on mechanisms - some dart guns have mechanisms built in that might become less smooth to operate with a few layers of paint on them - flick-out six-shooter barrels and the like. You may have to balance aesthetics with functionality when you decide to paint these.
Detail
If you're a veteran painter, you can go on to add detail, highlights, burn marks and other battle damage to your gun, but we won't cover that here - there are innumerable tutorials on the internet and youtube to get those sorts of looks.
You could look into various effect paints to add detail and give a unique look - iridescent paint will add sparkle, phosphorescent (proper glow-in-the-dark) and flourescent (glows in UV light) paint could give you nice effects. If you are an amateur electronics enthusiast, you could wire up some LEDs to a battery, and have the whole thing light up when you pull the trigger or something.
Varnish
Once you're done painting, you might be happy enough to stop there. The paint should be fairly resilient, and if you've done enough coats will be pretty unlikely to chip. However, a few layers of varnish will give you a smoother feel, and using a gloss varnish will add a nice sheen if you want that.

